Learn More About Fence Installation
Installing a fence around your property can enhance privacy, security, and curb appeal while defining boundaries. Whether you're considering wood, vinyl, metal, or composite materials, understanding the installation process helps ensure a successful project. From planning and permits to post-setting and finishing touches, each step requires careful attention. This guide walks you through essential considerations, material options, and expert insights to help you make informed decisions for your outdoor space.

Discover Expert Tips for Fence Installation
Successful fence installation begins with thorough planning and preparation. Before breaking ground, check local building codes and homeowner association regulations, as many areas require permits for fences exceeding certain heights. Mark your property lines accurately by consulting your property survey or hiring a professional surveyor to avoid disputes with neighbors. Consider underground utilities by calling your local utility locating service before digging post holes. Weather conditions also play a crucial role in timing your installation, as dry ground makes digging easier while avoiding frost or heavy rain ensures proper concrete setting. Experienced installers recommend measuring twice and cutting once, maintaining consistent spacing between posts, and using quality hardware that resists rust and corrosion for long-term durability.
Understand the Steps to a Successful Fence Project
A well-executed fence installation follows a systematic approach that ensures structural integrity and aesthetic appeal. Start by establishing corner posts, which serve as anchors for the entire fence line. Dig post holes to the appropriate depth, typically one-third the height of the post plus six inches for gravel base, ensuring stability against wind and soil movement. Set posts in concrete, checking for plumb alignment with a level on two adjacent sides before the concrete cures. Once corner and end posts are secure, stretch a string line between them to guide the placement of intermediate posts at regular intervals, usually six to eight feet apart depending on your fence style. After all posts are set and cured for at least 24 to 48 hours, attach rails or stringers horizontally between posts, followed by pickets, panels, or infill material. Finish with post caps, stain or paint as desired, and any decorative elements that complement your landscape design.
Explore Materials and Styles for Your Fence
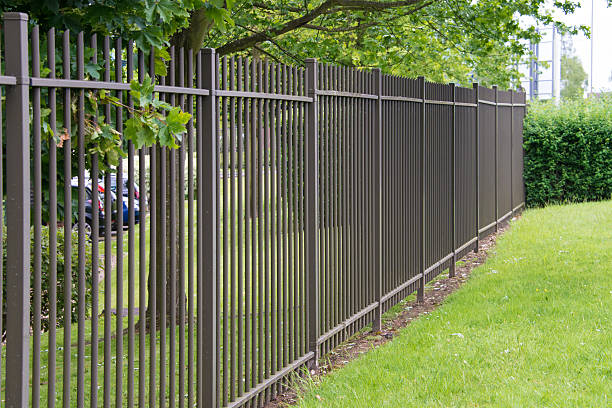
Choosing the right fence material significantly impacts appearance, maintenance requirements, and longevity. Wood remains a popular choice for its natural beauty and versatility, with cedar and redwood offering natural rot resistance while pressure-treated pine provides an economical option. Vinyl fencing has gained popularity for its low maintenance requirements and resistance to weathering, insects, and rot, though it typically carries a higher upfront investment. Metal options include aluminum, which resists rust and works well for decorative applications, and steel or wrought iron for maximum security and classic elegance. Chain-link fencing offers durability and affordability for utility purposes, while composite materials combine wood fibers with plastic polymers for a wood-like appearance with minimal upkeep. Style considerations range from privacy fences with solid panels or closely spaced pickets to open designs like split-rail or picket fences that define boundaries without blocking views. Your choice should balance aesthetic preferences with functional needs, climate conditions, and long-term maintenance commitment.
Get Insights from Experienced Installers
Professional fence installers emphasize several key practices that distinguish quality installations from problematic ones. Proper drainage around fence posts prevents water accumulation that leads to rot and instability, so adding gravel at the base of post holes before concrete helps water drain away. Experienced contractors stress the importance of using galvanized or stainless steel fasteners rather than standard hardware that rusts quickly in outdoor conditions. They recommend leaving appropriate gaps between fence boards or panels to allow for natural expansion and contraction with temperature and humidity changes, particularly important for wood fencing. When working on sloped terrain, installers suggest either stepping the fence in level sections or racking panels to follow the grade, depending on the fence style and degree of slope. Quality installers also advise clients about realistic timelines, noting that rushing the concrete curing process or skipping proper post alignment leads to costly repairs down the line. Many professionals recommend sealing or treating wood fences immediately after installation and maintaining regular treatment schedules to maximize lifespan.
Find Answers to Your Fence Installation Questions
Homeowners frequently wonder about the feasibility of DIY installation versus hiring professionals. While straightforward fence projects on level ground with simple designs can be manageable for experienced DIYers with proper tools, complex installations involving slopes, gates, or specialty materials often benefit from professional expertise. The timeline for fence installation varies based on project size, material choice, and weather conditions, but most residential projects take between two to five days for professional crews. Maintenance requirements differ significantly by material, with vinyl and composite requiring occasional washing while wood needs regular staining or sealing every two to four years. Gate installation requires special attention to hardware quality and hinge placement to prevent sagging over time, with larger gates often needing additional support structures. Many people ask about fence height restrictions, which typically range from four to six feet for front yards and six to eight feet for backyards, though local regulations vary. Understanding these common concerns helps you set realistic expectations and make informed choices throughout your fence installation journey.
Conclusion
Installing a fence represents a significant investment in your property that enhances functionality, privacy, and visual appeal for years to come. By understanding the essential steps, exploring material options, and applying expert insights, you can approach your fence project with confidence. Whether you choose to tackle installation yourself or hire experienced professionals, careful planning and attention to quality ensure results that meet your needs and stand the test of time. Taking the time to research local requirements, select appropriate materials, and follow proper installation techniques creates a fence that serves your property well while complementing your landscape design.


